

Hi everyone,
Well after spending the last couple of weeks making the Box of cards using the Prized Peony set, I’m totally ‘Peony’d’ out so I decided to have a play with the Today’s Tiles stamp set and dies.
There are so many colour schemes you could use with this set so it makes it very versatile.
The colours I have used are Seaside Spray & Misty Moonlight, Pretty Peacock & Just Jade, Cinnamon Cider & Bumblebee and Terracotta Tile & Roccoco Rose.
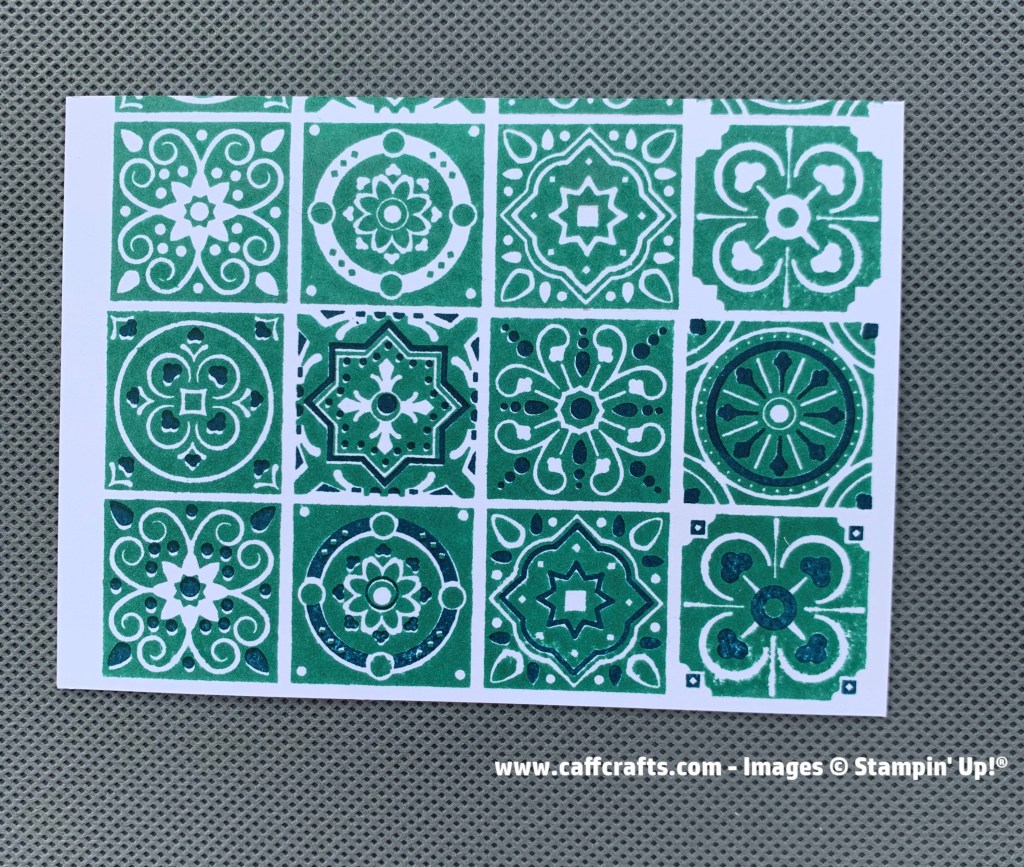
I heat embossed the darker detail which makes it shiny and raised making it look more authentic.
All materials, measurements and written instructions are below. The video tutorial can be found on the tutorial tab at the top of this page.
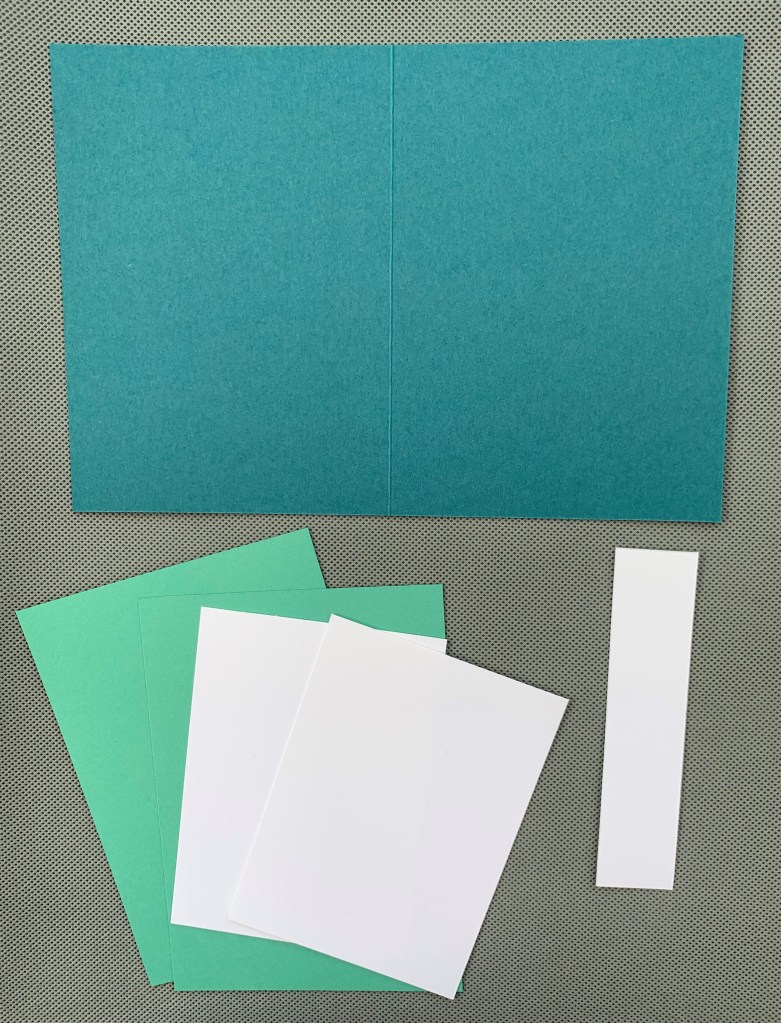
Using your darker colour, measure 8 1/4″ x 5 3/4″ and score at 4 1/8″ (21cm x 14.6cm scored at 10.5cm). This is for your card base.
For the inside and the front of the card you will need 2 x lighter coloured cardstock measured at 5 5/8″ x 4″ (14.3cm x 10.2cm)
You will need 2 x Whisper White cardstock measured at 4 1/2″ x 3 3/4″ (11.4cm x 9.5cm) – these measurements do not need to be exact as we will be trimming later on.
Finally, for the sentiment, you will need 1 x Whisper White cardstock measured at 4 1/4″ x 1″ (10.8cm x 2.5cm). These measurements do not need to be exact as we will be die cutting later on.
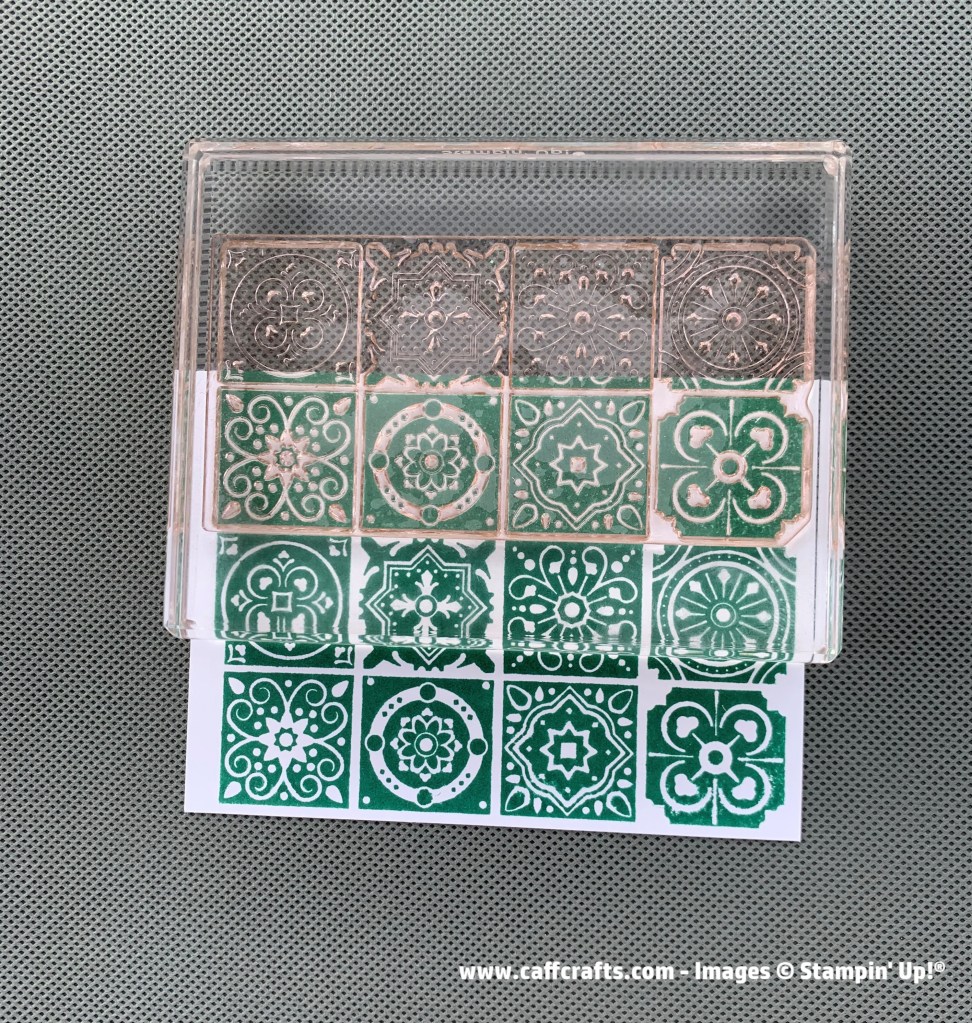
Stamp the first image using your lighter ink at the bottom of one of your whisper white pieces, leaving a small border.
Re-ink half the stamp again using your lighter ink and stamp a third row of tiles on top of the two you have already created.
Stamp the second image using your darker ink and line up over the top of your original image.
Re-ink half the stamp again using your darker ink and stamp over the third row of tiles. The image shows just the bottom two rows stamped with the darker ink.
Clean the ink off the stamp just used but keep it on the block.
Re-ink using embossing ink and stamp over the image again, remembering to repeat with the third row of tiles.
Cover with Clear embossing powder, remove the excess and heat until melted using a embossing heat gun.
Trim around the image leaving a small border all around and then adhere to the 2nd piece of Whisper White cardstock, trimming as necessary.
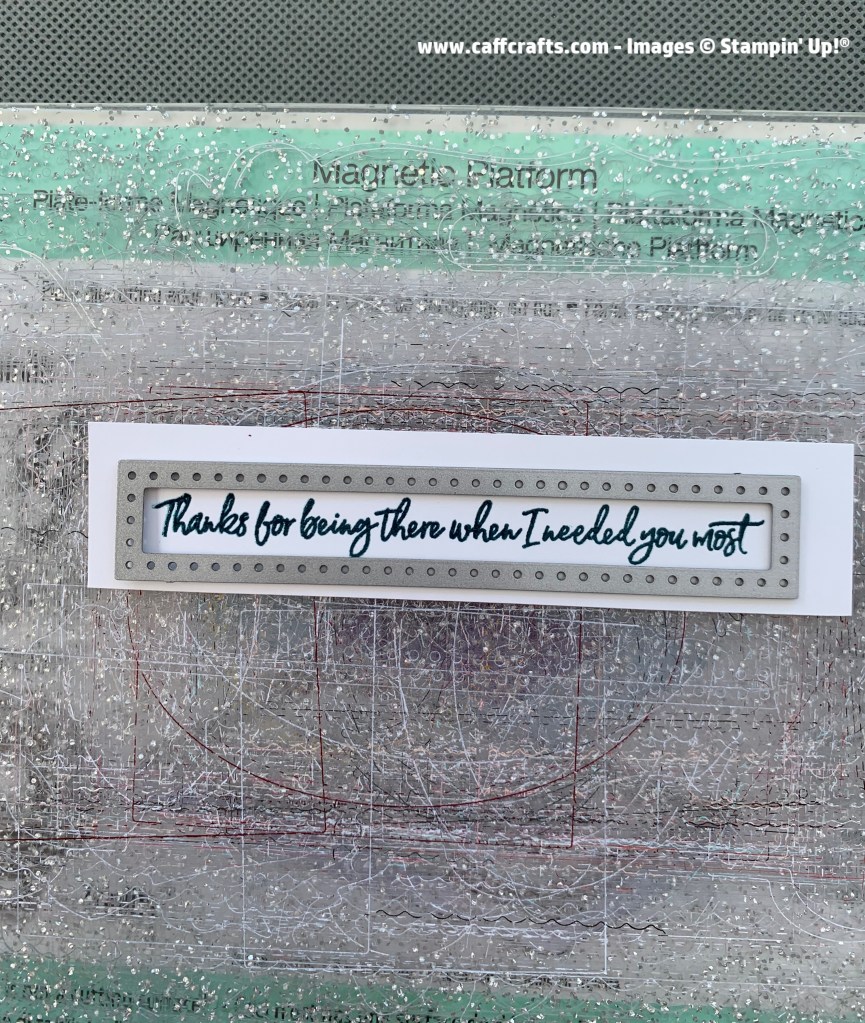
Stamp your sentiment on the remaining piece of cardstock using the Stamparatus, do not remove the stamp if you want to heat emboss the sentiment.
Clean the ink off the stamp and apply embossing ink, clear embossing powder and heat to set.
Die cut your sentiment using the long die from the Field Tiles dies.

You’re now ready to put the card together.
I really hope you enjoy making this project.
Let me know if you have any queries.
Have a good day!
Alison xx


Great cards
LikeLiked by 1 person
Thank you
LikeLike
Love these cards
LikeLike
Thank you.
LikeLike