
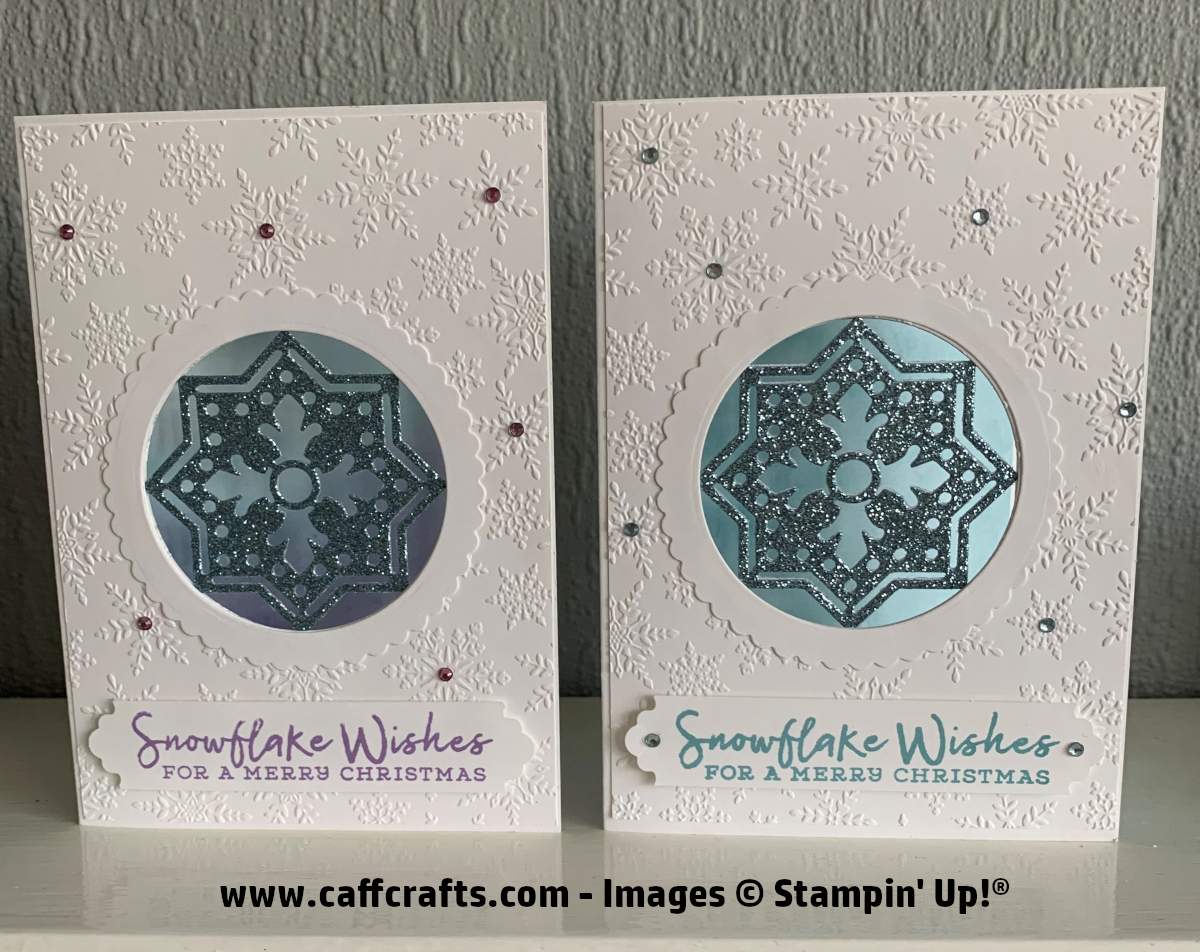
So this is my first Christmas card made for this year, I wasn’t intending on starting my Xmas cards just yet.
I knew that I wanted to create a card using the decorative square die from the Field Tiles dies.
I was going to create a square aperture and then remembered that I didn’t have the square layering dies (ordered now).
So I used the Circle Layering dies instead as I noticed the centre of the die cut image looked like a snowflake.
I also made this card using the new Stampin’ Up! Cut and Emboss machine that is available to buy from the 1st September 2020 so be sure to check out my YouTube video if you would like to see this in action!!
Written instructions along with the measurements and materials used are below. A video tutorial can be found on the Tutorials tab at the top of this page.
For this card you will need:
1 x Whisper White Thick Cardstock measuring 8 1/4″ x 5 3/4″ – (21cm x 14.6cm) scored at 4 1/8″ – (10.5cm)
2 x Whisper White Cardstock measuring 5 5/8″ x 4″ – (14.3cm x 10.2cm) – For front and inside layer
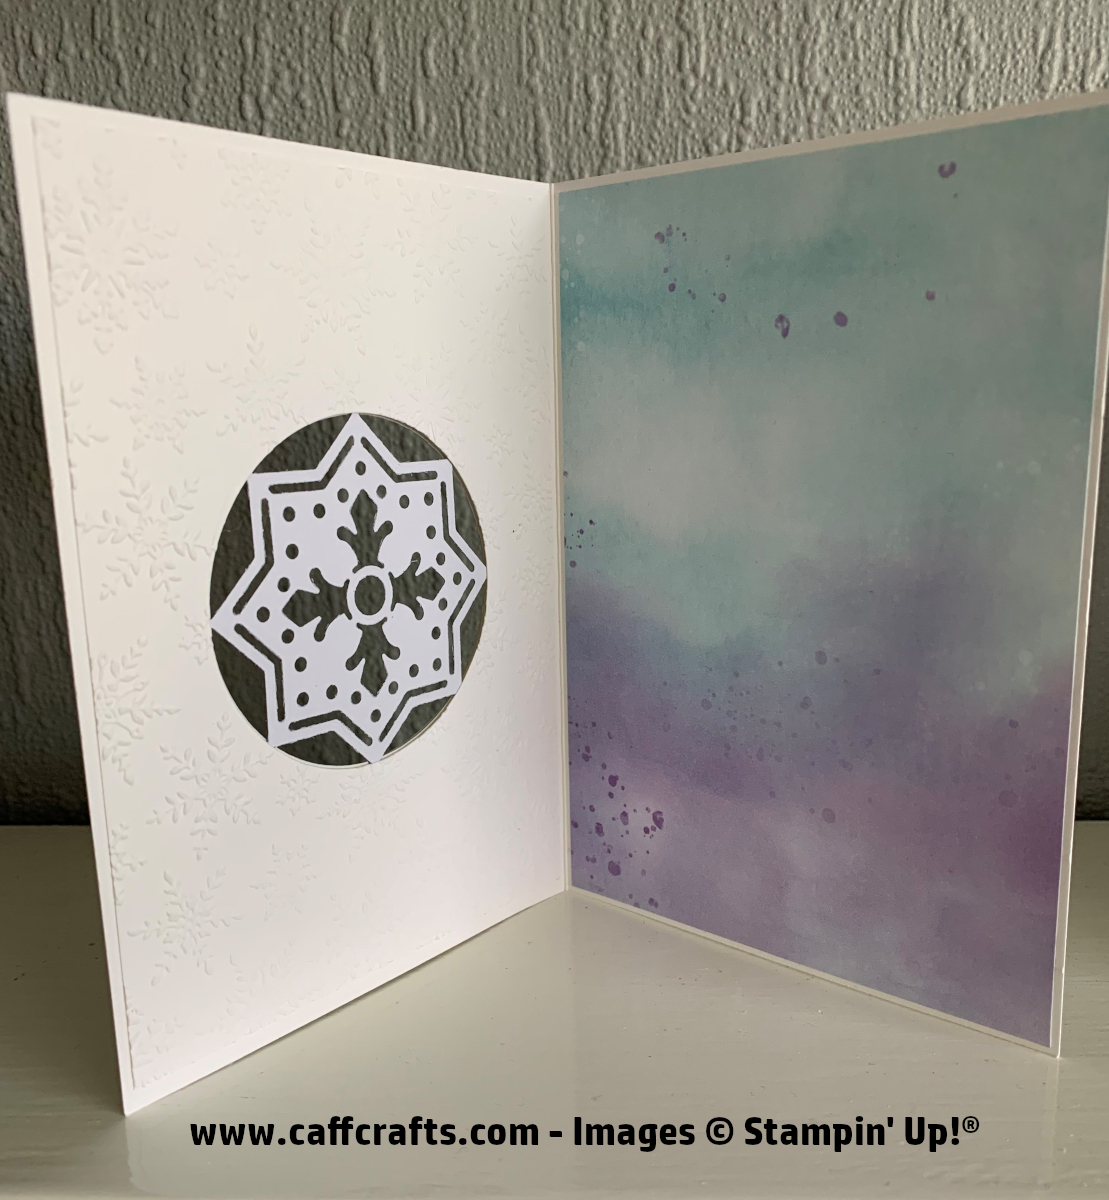
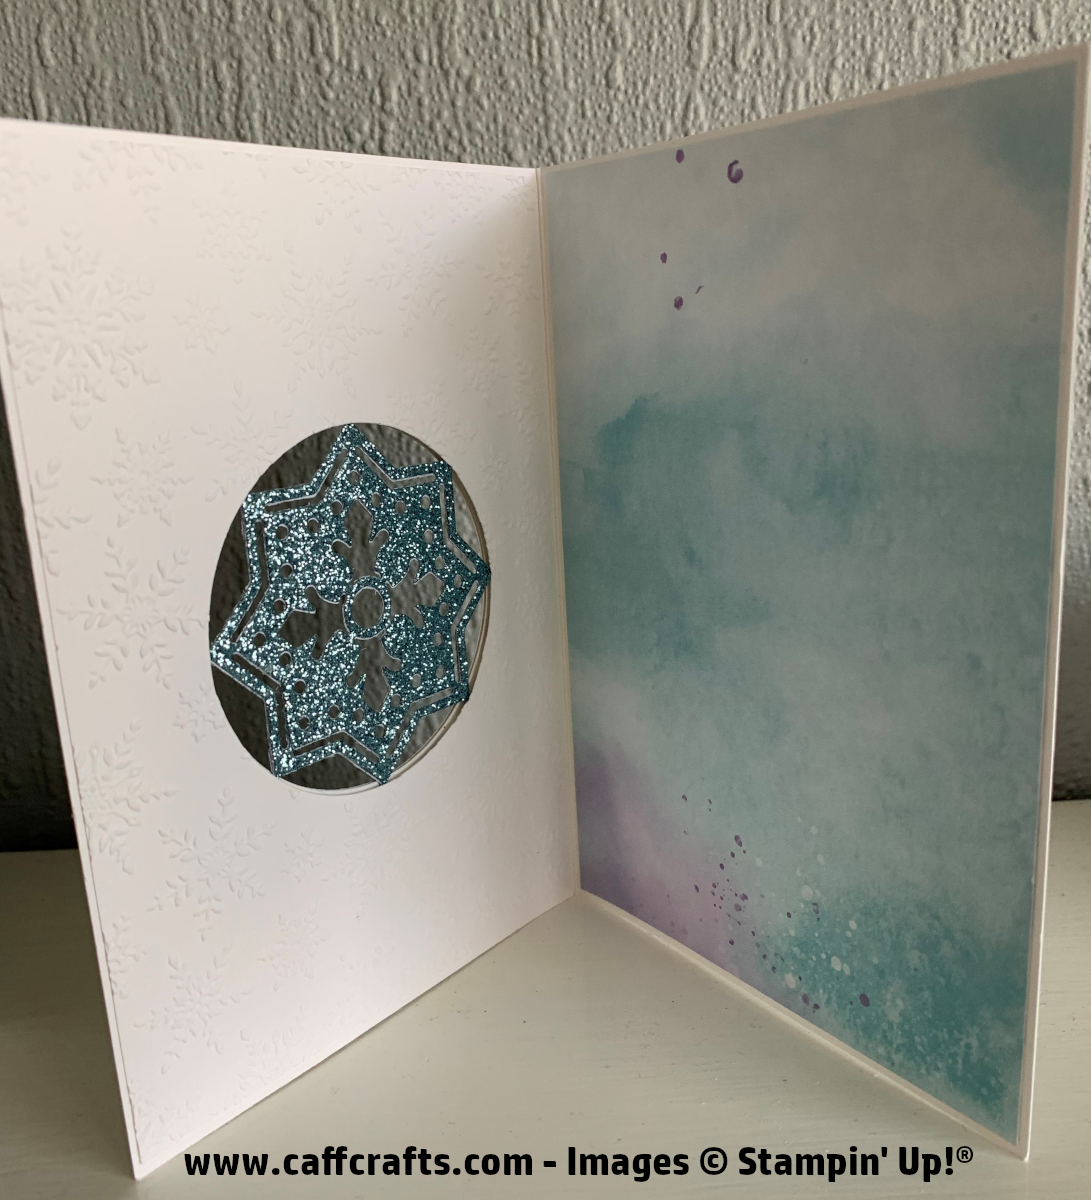
1 x Designer Series Paper (DSP) measuring 5 5/8″ x 4″ – (14.3cm x 10.2cm) – For inside of card
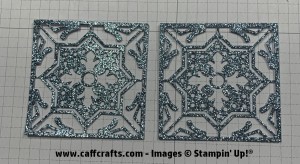
2 x Balmy Blue Glimmer Paper measuring 3″ x 3″ – (7.6cm x 7.6cm)
1 x Whisper White Cardstock measuring 3 1/2″ x 3 1/2″ – (8.9cm x 8.9cm) – this size can be approximate – For frame
1 x Whisper White Cardstock measuring 4″ x 3/4″ – (10.2cm x 1.9cm) – For sentiment
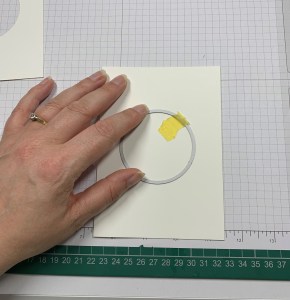
Start by using the Number 6 die from the Layering Circle dies and centre on the front part of your card and run this through your die cutting machine making sure that your card is opened up.
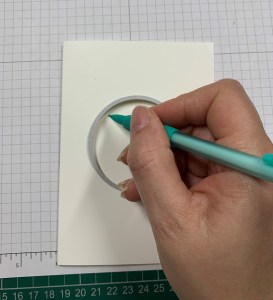
We now need to create the circle in your front layer, with the wrong side of the cardstock facing you, line up on the inside of the card and close the card ensuring that the layer does not move, position the number 6 die in the hole already created and draw round the inside of the die using a pencil, line up the die with your pencil line and run this through your die cutting machine.
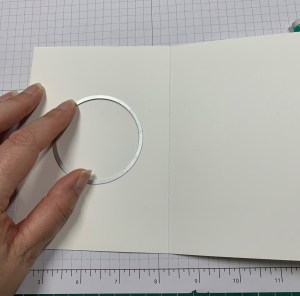
To create the hole in the inside layer you need to have the wrong side of the layer facing up and this time line up on the front of the card, turn the card over and draw round the inside of the die using a pencil, line up the die with your pencil line and run this through your die cutting machine.
Emboss both of these pieces using the Winter Snow embossing folder.
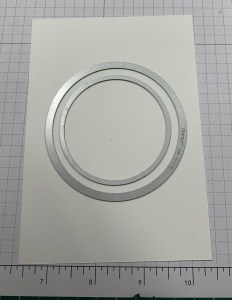
Now for the frame on the front of the card, position the number 8 scallop die and number 6 plain die from the Layering Circle dies, ensuring they are evenly spaced all round and run this through your die cutting machine.
Position the decorative die from the Field Tiles dies onto the balmy blue glimmer paper and die cut each one separately.
Adhere both balmy blue pieces back to back together so that the glitter is showing both sides and adhere this to the inside of your card, ensuring it is centre to the circle.
Adhere one of the embossed pieces to the front and adhere the other one on the inside of the card on the left hand side, adhere the DSP on the right hand side.
Adhere the frame around the aperture on the front of the card.
Punch the whisper white cardstock using the Lovely Labels Pick A Punch and stamp your sentiment using Balmy Blue Classic Stampin’ Pad , apply to the bottom of the card using Stampin’ Dimensionals.
Go over some clear rhinestones using the Dark Balmy Blue Stampin’ Blend and apply randomly to your card in the centre of some of the snowflakes.
Your card is now finished, I hope you like this project!
Links to all materials used can be found below.
Have a good day!
Alison xx


Beautiful! Looks like I’ll have to order the Field Tile dies!! xx
LikeLike
Thank you.
I love the stamp set too! Xx
LikeLike
Great cards
LikeLiked by 1 person
Thank you.
LikeLike